Why DIY Kitchen Decor?
Transforming your kitchen doesn’t always require a hefty renovation budget or professional help. DIY kitchen decor offers a fantastic opportunity to personalize your space, express your creativity, and add a touch of your unique style. Drawing inspiration from platforms like Pinterest, you can discover a wealth of innovative, budget-friendly ideas that can completely revitalize your kitchen. DIY projects empower you to control the design process, select materials that align with your preferences, and save significantly on costs. Moreover, the satisfaction of completing a DIY project and seeing your vision come to life is unparalleled, making your kitchen a more welcoming and enjoyable space. With a little bit of effort and creativity, you can create a kitchen that reflects your personality and meets your practical needs, all while staying within your budget. Ready to dive in and transform your space?
Budget-Friendly Kitchen Makeover Ideas
Embarking on a kitchen makeover doesn’t mean breaking the bank. There are countless budget-friendly strategies to refresh your space without sacrificing style or functionality. Consider repurposing existing items, such as old furniture or storage containers, to give them a fresh new life with paint or creative modifications. Focusing on high-impact, low-cost changes, such as replacing cabinet hardware or adding a fresh coat of paint to your cabinets, can significantly alter the look and feel of your kitchen. Another excellent approach is to incorporate DIY decor projects, which allow you to create custom pieces that perfectly suit your style while staying within your budget. These could range from simple projects like painting a backsplash or crafting open shelving to more involved endeavors like a kitchen island makeover. By strategically combining these techniques, you can create a stylish and functional kitchen without the need for extensive renovations or expensive new appliances. Embrace the DIY spirit and explore the possibilities of transforming your kitchen into a space you’ll love, all while keeping your finances in check.
DIY Kitchen Decor Idea 1: Open Shelving

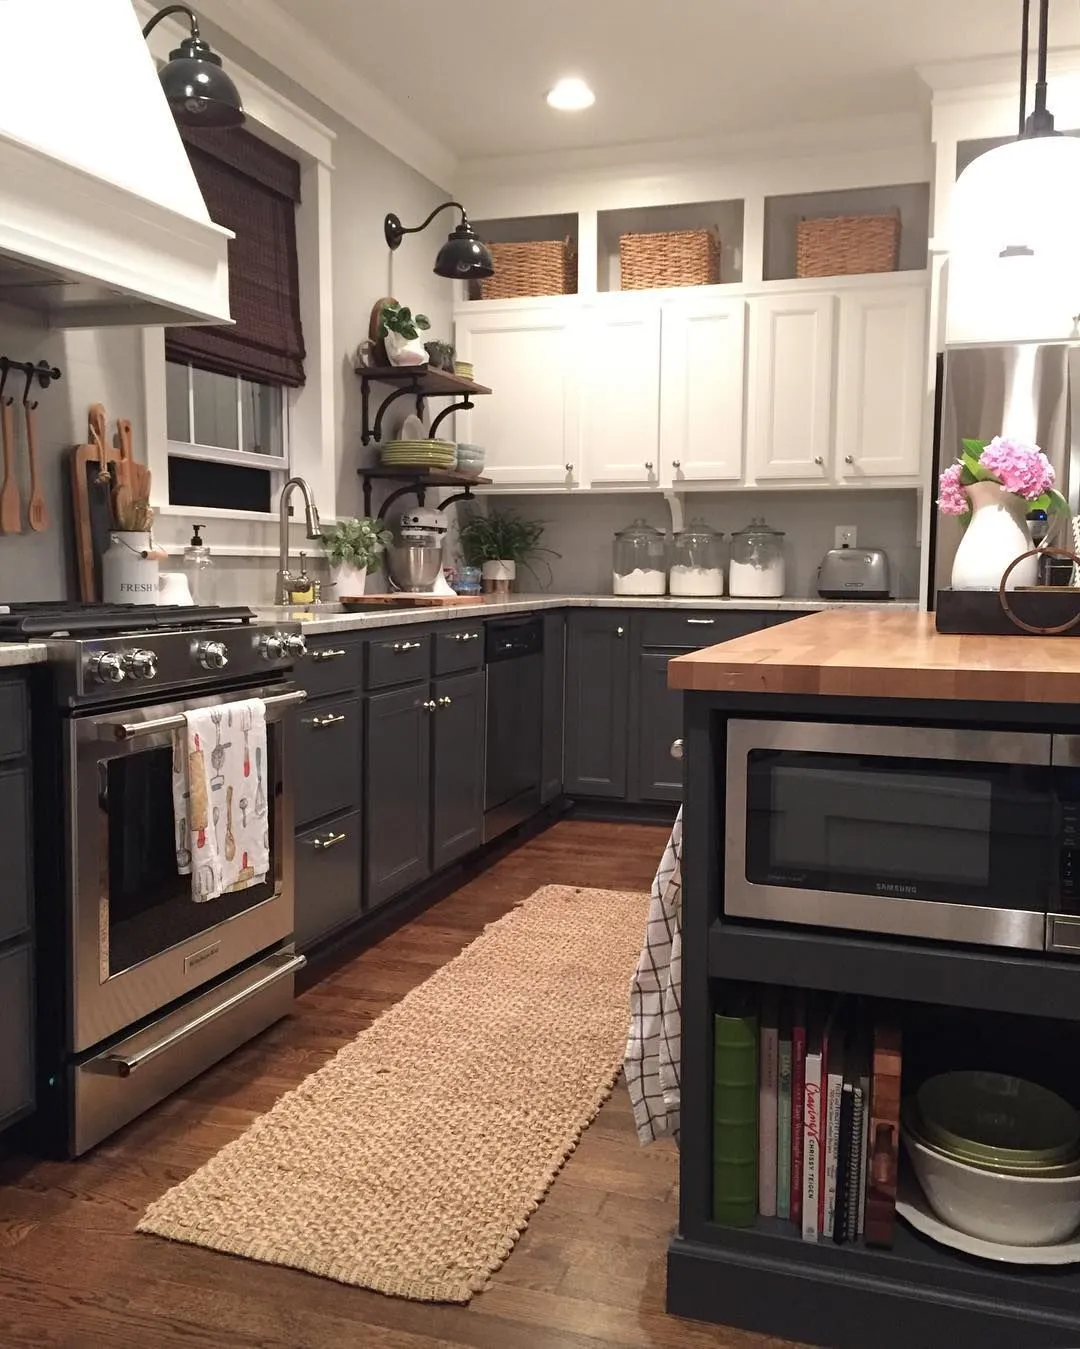
Open shelving is a brilliant way to infuse a kitchen with a modern, airy feel while providing practical storage and display space. Instead of bulky upper cabinets, opt for floating shelves to showcase your favorite dishware, cookbooks, and decorative items. This design choice not only opens up the kitchen visually but also makes frequently used items easily accessible. It’s a versatile option that can be adapted to fit any kitchen size or style, from rustic farmhouse to sleek contemporary. Open shelving enhances the overall aesthetic of the kitchen, creating a sense of spaciousness and allowing your personal style to shine through. Plus, with a little DIY effort, you can easily customize the shelves to fit your specific needs and preferences. This project is not only functional but also a stylish addition to any kitchen.
Materials Needed for Open Shelving
Gathering the right materials is key to a successful open shelving project. You’ll need wooden boards cut to your desired shelf lengths; the type of wood can vary depending on your style (pine for a rustic look, or hardwood for a more refined aesthetic). Purchase sturdy shelf brackets designed to support the weight of your items. Ensure you have screws appropriate for both the brackets and your wall type (drywall anchors are usually necessary). Additionally, you’ll need a drill, a level, a measuring tape, sandpaper, wood stain or paint (depending on your preference for the finish), and safety gear like gloves and safety glasses. Consider the weight capacity of your shelves when choosing materials to ensure they can safely hold your items. Having all the necessary materials before starting will make the process smoother and more efficient, leading to a beautifully finished open shelving unit that adds both function and style to your kitchen.
Step-by-Step Guide to Building Open Shelves
Start by measuring and marking the placement of your shelf brackets on the wall, ensuring they are level and correctly spaced to support your shelves. Pre-drill holes for the screws to prevent the wood from splitting. Attach the brackets securely to the wall using appropriate anchors for your wall type. Then, sand the wooden boards to create a smooth surface, and apply the stain or paint, allowing it to dry completely. Once dry, carefully position the shelves onto the brackets, and secure them with screws from underneath if the brackets require it. Double-check the level of your shelves to ensure everything is aligned. Finally, decorate your new open shelves with your favorite kitchen items, and enjoy your enhanced and stylish kitchen space. Remember to always prioritize safety and follow the manufacturer’s instructions for all materials and tools.
DIY Kitchen Decor Idea 2: Chalkboard Wall

A chalkboard wall is a versatile and stylish addition to any kitchen. It provides a practical space for jotting down recipes, creating grocery lists, or leaving inspirational messages. Beyond its functionality, it also adds a unique visual element, offering a casual and inviting feel to the kitchen space. You can customize the look by framing it, adding decorative elements, or painting it in different colors to complement your kitchen’s decor. This project is relatively easy to implement and provides a creative outlet for self-expression and a playful vibe. The chalkboard wall can be a focal point in your kitchen, perfect for making announcements, displaying artwork, or simply adding a personal touch. It’s a great way to personalize your space and make it more interactive and enjoyable for everyone.
How to Create a Chalkboard Wall in Your Kitchen
Begin by preparing your wall. Clean the surface thoroughly to remove any grease or dirt. If the wall is already painted, lightly sand it to promote adhesion. Apply painter’s tape to protect the surrounding areas. Apply a coat of chalkboard paint, using a brush or roller, making sure to cover the entire area evenly. Let the first coat dry completely according to the product instructions, typically several hours or overnight. Apply a second coat for better coverage and a smoother finish. Once the second coat is dry, lightly sand the surface to remove any imperfections. Cure the chalkboard paint by rubbing chalk over the entire surface and then wiping it clean; this process prevents ghosting of the first writings. You can then start using your new chalkboard wall. Remember to choose a chalkboard paint that suits your needs and is safe for use in your kitchen.
Chalkboard Wall Decor Ideas
Your chalkboard wall offers endless possibilities for creative expression. Use it to write the menu for the week, list your favorite recipes, or leave sweet notes for your family. You can draw fun illustrations, create seasonal artwork, or write inspirational quotes. Frame the chalkboard with wood or decorative trim for a more polished look, or add shelves to display chalk, markers, or decorative items. Consider using stencils to create intricate designs, or utilize colorful chalks to brighten the space. The chalkboard wall can be a functional and artistic element in your kitchen, changing with your mood, the season, or special occasions. Explore different fonts, styles, and layouts to continually refresh the look and keep your kitchen decor exciting and personalized. The goal is to create a space that is both visually appealing and practical.
DIY Kitchen Decor Idea 3: Mason Jar Organizers

Mason jars are incredibly versatile and affordable for kitchen organization. They can be repurposed into stylish and practical storage solutions, helping you declutter countertops and maximize space. From storing dry goods like pasta and beans to holding utensils and spices, mason jars offer a simple yet elegant way to organize your kitchen essentials. This DIY project is a great way to personalize your kitchen while keeping it tidy and efficient. It is also an eco-friendly option, repurposing materials and reducing waste. Mason jar organizers are not only practical but also add a charming, rustic touch to your kitchen decor, perfectly blending functionality with aesthetic appeal. The project is easily adaptable and can be customized to match your existing decor.
Mason Jar Organizer Materials
Gathering the right materials is key to successfully creating mason jar organizers. You will, of course, need mason jars in various sizes, depending on your storage needs. You’ll want to ensure the jars are clean and dry before beginning. Consider lids for the jars, and choose from standard lids, chalkboard labels, or decorative lids. You might also need materials to customize your organizers, such as paint (chalk paint or acrylic), decorative twine or ribbon, stencils, or adhesive labels. You might also need a glue gun and glue sticks, along with any other items to personalize your jars such as wooden boards, metal wire, or hooks. Have all your materials gathered and ready to go to ensure your project runs smoothly and efficiently. The materials you choose will determine the final look and function of your organizers.
Creating Mason Jar Organizers
Start by preparing your mason jars. Clean and dry them thoroughly. If painting, apply a base coat and let it dry before adding any decorative elements. Use stencils or freehand designs to personalize the jars. Attach labels to help identify the contents. For a rustic look, wrap twine or ribbon around the jars. For hanging organizers, consider attaching lids with wire and hooks. Arrange your jars according to your needs. You can place them on shelves, countertops, or inside your pantry, based on your style. Mason jars can be used to organize your kitchen items, making your kitchen organized and stylish. Make sure the organizers are practical and match your personal style and kitchen design.
DIY Kitchen Decor Idea 4: Floating Spice Racks

Floating spice racks are both a practical and stylish addition to a kitchen. They not only make your spices easily accessible but also add a decorative element to your walls. Creating your own floating spice racks is a simple DIY project that can significantly enhance the functionality and aesthetic of your kitchen. By using reclaimed wood, you can add a rustic touch to your kitchen decor while saving money. Customizing the size and finish of your spice racks allows you to perfectly match your existing kitchen style. A well-designed spice rack offers not only storage but also a visually appealing way to display your spice collection, improving the kitchen’s overall organization and look.
Spice Rack Materials and Tools
To build your own floating spice racks, you’ll need some basic materials and tools. You’ll need wood planks of your desired length and width. Consider using reclaimed wood for a rustic feel or choose a wood type that complements your kitchen’s design. You’ll also need shelf brackets, screws appropriate for the brackets and your wall type (drywall anchors may be necessary), wood stain or paint to finish the wood, sandpaper, a drill, a level, a measuring tape, and safety glasses. Gather all these items beforehand to ensure you have everything on hand. It is important to make sure the wood and brackets are sturdy enough to hold the weight of your spice jars. For added flair, you can include decorative elements, such as stencils or labels.
Building Floating Spice Racks
Measure and cut your wood planks to the desired length. Sand the wood smooth and stain or paint it according to your preferences, allowing it to dry thoroughly. Attach the shelf brackets to the wood planks using screws. Determine the placement of your spice racks on the wall, making sure they are level. Pre-drill holes in the wall before attaching the brackets using screws and wall anchors if needed. Securely fasten the spice racks to the wall, double-checking that they are level. Once the racks are mounted, arrange your spice jars neatly, and admire your newly organized and stylish kitchen space. Always follow safety guidelines when using power tools and consult professional help if needed.
DIY Kitchen Decor Idea 5: Painted Backsplash

A painted backsplash is an excellent way to infuse personality into your kitchen. It’s an affordable alternative to installing traditional tile, yet it offers a high-impact visual upgrade. The right color or design can transform the look of your kitchen, enhancing its overall aesthetic. The options are vast, allowing you to choose from solid colors, patterns, or even faux tile designs, making it a versatile DIY project suitable for any design preference. A painted backsplash can protect your walls from spills and splatters, making it a practical and stylish addition to your kitchen. Plus, the project can typically be completed within a weekend, delivering an impressive change with minimal effort and expense.
Choosing the Right Paint for Your Backsplash
Selecting the right paint is critical for a successful painted backsplash. Opt for a high-quality, moisture-resistant paint designed for kitchens and bathrooms. Semi-gloss or gloss finishes are excellent choices, as they are easy to clean and withstand spills and splatters. Consider the color and finish that best complements your kitchen’s existing décor. If you want to create a pattern, you might consider using stencils and multiple paint colors. Make sure the color and paint you choose are durable and easy to clean. Always test your paint choice in an inconspicuous area before painting the entire backsplash. Be sure to consider the paint’s drying time and any special instructions or requirements before starting your project.
Painting Your Kitchen Backsplash
Start by preparing your surface, cleaning the existing backsplash with soap and water to remove grease and dirt. Use painter’s tape to protect your countertops, cabinets, and adjacent walls. If your backsplash is glossy, lightly sand it to promote paint adhesion. Apply a primer appropriate for the surface to improve paint adherence and coverage, and allow it to dry completely. Apply the first coat of paint, using a brush or roller, ensuring even coverage. Let the first coat dry, then apply a second coat for more vibrant color and better durability. If you are creating a pattern, use stencils and different colors to add interest. After the paint is dry, remove the tape carefully and inspect your new backsplash. Enjoy your transformed kitchen space. Always allow adequate drying time between coats.
DIY Kitchen Decor Idea 6: Kitchen Island Makeover

A kitchen island makeover is a fantastic way to give your kitchen a fresh new look without undertaking a complete renovation. It provides a focal point, adding both style and functionality to your kitchen. The beauty of this DIY project is its flexibility; you can customize it to match your tastes and kitchen layout. Whether you choose to paint, add new hardware, or even install a new countertop, a kitchen island makeover can significantly improve the aesthetics and usability of your space. It’s an excellent project for those looking to enhance their kitchen’s appearance and create a more enjoyable cooking and gathering area. The project can also increase the value of your home and its visual appeal.
Kitchen Island Makeover Materials
The required materials will vary depending on the scope of your kitchen island makeover. Start by gathering your existing island to assess what needs improvement. If you’re planning to paint, you’ll need paint appropriate for cabinetry, primer, paintbrushes, and rollers. New hardware, such as drawer pulls and cabinet knobs, can dramatically change the look; gather the appropriate sizes and types. For a new countertop, you might need to purchase a wood or other material and any necessary tools. Sandpaper, wood filler, and caulk can be useful for preparing the surface. Consider the condition of your existing island and plan the materials required to match your design vision. Remember to have all necessary safety gear.
Step-by-Step Kitchen Island Makeover Guide
Start by preparing your kitchen island. Clean the surfaces and remove any hardware like knobs and pulls. If painting, sand the surfaces, fill any imperfections with wood filler, and prime the island. Apply a coat of paint, allowing it to dry before applying a second coat. For a countertop upgrade, remove the existing surface and install the new one, following the manufacturer’s instructions. Install new hardware. Add decorative elements such as open shelving, or a new backsplash. The final result will depend on the scope of your project and the choices you make. Regularly inspect and clean your finished kitchen island, and enjoy your newly transformed space. With some planning, you can create an island that enhances both form and function.
DIY Kitchen Decor Idea 7: Rustic Signage

Rustic signage is a charming and inexpensive way to add personality and warmth to your kitchen. These signs can feature inspirational quotes, family recipes, or simple kitchen-related phrases. They add a touch of homemade charm and make your kitchen feel more inviting and personal. You can create signs of various shapes and sizes, using different materials and techniques to match your kitchen’s decor. This DIY project is perfect for those who appreciate farmhouse style or appreciate a more relaxed, lived-in kitchen atmosphere. With your signage, you can turn a functional space into a visually interesting and welcoming heart of the home.
Materials for Rustic Kitchen Signage
You’ll need a few key materials to make rustic kitchen signage. Reclaimed wood boards are a perfect base, offering an authentic, weathered look. If you can’t find reclaimed wood, you can purchase new wood and distress it yourself. You’ll need wood stain or paint, sandpaper, stencils or a Cricut machine for the lettering, and paint pens or brushes. Consider purchasing adhesive stencils for ease, or create your own using a cutting machine. Additionally, you’ll need screws and mounting hardware for hanging your sign. A level is also essential for ensuring your sign hangs straight. Gather all your materials before beginning to save time.
Creating Rustic Signs for Your Kitchen
Prepare the wood. Sand it to remove any rough edges and apply the stain or paint of your choice. Once dry, use stencils or freehand to write your desired text on the board. If using stencils, secure them firmly before painting. If freehanding, use a pencil to lightly sketch the design before painting. Let the paint dry completely. Consider adding a frame using trim pieces for a more polished look. Attach mounting hardware to the back of the sign. Hang your sign and enjoy your unique and stylish kitchen decor. You can customize the font, colors, and phrases to create a sign that perfectly complements your kitchen’s style.
Conclusion
DIY kitchen decor projects provide a fantastic way to enhance your home without requiring a massive budget or professional help. From open shelving and chalkboard walls to painted backsplashes and rustic signage, the ideas are practically limitless. By incorporating these creative DIY solutions, you can customize your kitchen to reflect your style and personal preferences. It is about enjoying the creative process while creating a space that is both functional and beautiful. Embrace the DIY spirit, explore the endless possibilities, and transform your kitchen into a space you’ll absolutely love. Your perfect kitchen is within reach, one DIY project at a time.