Planning Your Rustic Red Kitchen Worktop
Embarking on a DIY project to create a rustic red kitchen worktop is a rewarding endeavor. Before diving into the practical steps, meticulous planning is crucial. Begin by assessing your existing kitchen space and the overall aesthetic you wish to achieve. Consider the size and shape of your worktop area. Determine the level of usage your worktop will endure, as this influences material selection. Sketching out a design plan helps visualize the finished product. Researching different rustic design elements, like the use of natural materials and warm color palettes, ensures your worktop harmonizes with the kitchen’s ambiance. Evaluate your current skill level and the tools you have available. This enables you to anticipate any potential challenges. Accurate measurements are vital to avoid costly mistakes and material wastage, so taking precise measurements is essential. Decide whether to incorporate any additional features such as integrated sinks or edge treatments. This preliminary planning phase sets the foundation for a successful and visually appealing rustic red kitchen worktop, aligning it perfectly with your design vision.
Measuring Your Kitchen Worktop
Accurate measurements are fundamental to the success of your rustic red kitchen worktop project. Begin by clearing the existing worktop area. Use a measuring tape to determine the length and width of the worktop space. Measure in several places to account for any slight variations. Record these measurements meticulously, including any cutouts needed for sinks, cooktops, or other fixtures. Note the thickness of the existing worktop. Then, determine the overhang, which is the amount the worktop extends beyond the cabinets. Ensure you also measure the edges of the worktop, and determine the position and dimensions of any existing sink or hob cutouts. For complex shapes or unusual angles, consider creating a template using cardboard or thick paper. This allows you to transfer the exact measurements to the new worktop material. Double-check all measurements before cutting or ordering any materials. Take into account that precise measurements are critical for proper installation and a seamless finish. Accurate measurements minimize waste and ensure the worktop fits perfectly within the kitchen space. This attention to detail guarantees that your rustic red kitchen worktop seamlessly enhances the overall kitchen design.
Choosing Your Worktop Material

Selecting the right material is a pivotal step in crafting your rustic red kitchen worktop. The material you choose will greatly impact the look, durability, and maintenance requirements of your kitchen. Several options are available, each with its unique properties. Consider the budget you are working with, the desired aesthetic, and how the worktop will be used. Some materials, like solid wood, provide a warm, natural appearance that complements a rustic design. Other materials offer greater resistance to heat, scratches, and stains. Evaluate the materials based on their ease of maintenance and cleaning. Consider the long-term durability of the material. Look at your personal taste and lifestyle, as the choice of material plays a huge role in your kitchen’s overall functionality and aesthetic appeal. Carefully weigh the pros and cons of each material type before making a final decision. Understanding the characteristics of different materials guarantees that you select the most suitable option, enhancing both the visual charm and the practical usability of your rustic red kitchen worktop. The decision depends on your preference and requirements.
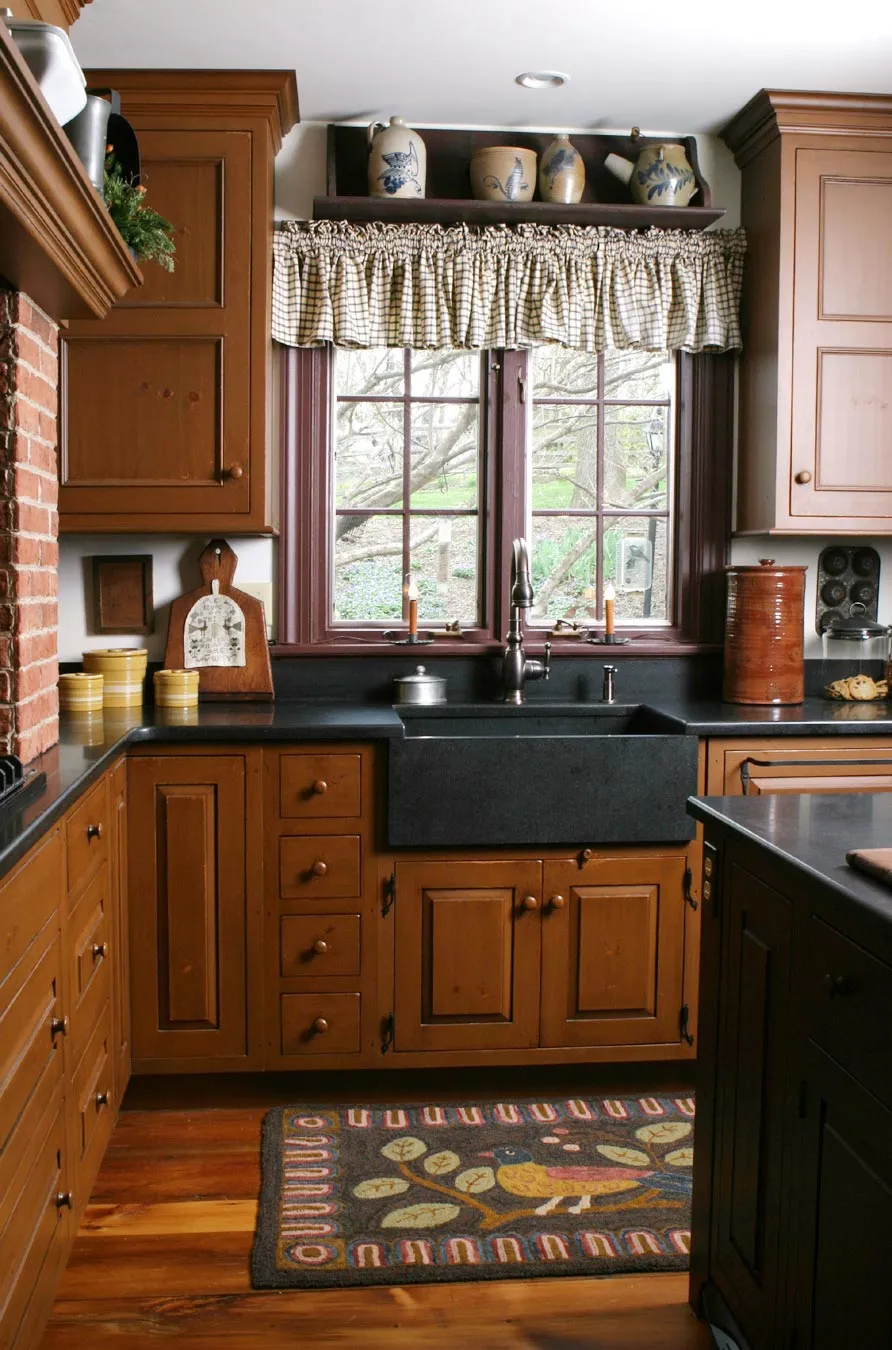
Solid Wood Worktops
Solid wood worktops are a classic choice for a rustic kitchen, imparting warmth, character, and natural beauty. They are typically made from hardwood species such as oak, walnut, or maple. Wood worktops offer a unique grain pattern, making each one distinct. They create a cozy and inviting atmosphere. Their porous nature makes them susceptible to moisture and staining, requiring regular maintenance. Regular oiling or sealing is crucial to protect the wood from water damage and enhance its durability. Solid wood worktops can develop scratches and marks over time, adding to their charm and rustic aesthetic. However, they can also be easily repaired with sanding and refinishing. Consider the type of wood and its inherent properties when selecting a solid wood worktop. Different wood species offer varied levels of hardness and resistance to wear and tear. While they may require more upkeep, solid wood worktops add timeless elegance and authenticity to any rustic kitchen design, bringing natural elements and a touch of history into the space.
Laminate Worktops
Laminate worktops present a cost-effective and versatile option for a rustic red kitchen. Made by bonding a decorative surface layer to a substrate, such as particleboard, they offer an extensive range of design options, including wood grain effects. They are relatively easy to install and maintain. They are resistant to scratches, stains, and moisture. Laminate worktops are available in various colors and patterns. This allows you to create a rustic look without the higher price tag of natural materials. While they are durable, laminate worktops can be damaged by excessive heat or sharp impacts, and any damage will be challenging to repair. They may not provide the same tactile feel as natural materials. Make sure the edges are sealed correctly to prevent water damage. The affordability and low maintenance make laminate an attractive option for those seeking a practical and budget-friendly solution for their kitchen. With proper care, laminate worktops can bring the aesthetic appeal of wood or stone to your kitchen. They can easily integrate the overall design.
Butcher Block Worktops

Butcher block worktops are a fantastic choice for a rustic kitchen, offering both functionality and aesthetic charm. They are constructed from strips of wood that are glued together to form a solid surface. This construction style results in a sturdy, durable worktop ideal for food preparation. The end-grain butcher block adds a unique visual texture. Butcher block worktops add a warmth that other materials lack, enhancing the kitchen’s overall ambiance. They are relatively easy to maintain, requiring regular oiling to preserve the wood and protect it from moisture. These worktops are prone to scratches and stains and can be easily sanded and resealed to restore their original look. The rustic aesthetic that butcher block worktops create blends seamlessly with traditional and modern kitchen styles, making it a versatile option. They can also serve as an eye-catching centerpiece. It offers a practical and visually appealing workspace. The classic design adds an element of rustic charm and functional elegance to the heart of your home.
Granite Worktops
Granite worktops bring luxury and durability to a rustic kitchen. Granite is a natural stone that offers a unique and elegant aesthetic. It is known for its resilience and resistance to heat, scratches, and stains. Each granite slab is unique, with variations in color and pattern, which adds character and charm to the kitchen. The stone’s natural beauty complements various rustic design schemes, creating a high-end look. Granite worktops are highly durable and long-lasting, making them a worthwhile investment. They require minimal maintenance, typically needing only regular cleaning with mild soap and water. Sealing is essential to prevent staining from spills, but once sealed, granite is exceptionally low-maintenance. The density of granite makes it naturally resistant to bacteria and germs, ensuring hygiene. With proper care, a granite worktop will retain its beauty and functionality for many years. Granite worktops bring a touch of sophistication to any rustic kitchen, combining beauty, durability, and ease of maintenance, which makes it a top choice for homeowners.
Quartz Worktops
Quartz worktops provide a sophisticated and durable option for creating a rustic red kitchen. Engineered from crushed quartz, combined with resins and pigments, quartz offers a range of colors and patterns. The material is non-porous and highly resistant to stains, scratches, and heat, making it ideal for busy kitchens. Quartz worktops require very low maintenance, only requiring occasional cleaning with mild soap and water. They are available in a variety of finishes. Quartz can emulate the look of natural stone, such as granite or marble. The uniform appearance of quartz allows you to bring consistent color throughout your kitchen. The manufactured nature of quartz makes it consistent and provides the potential for unique designs, which adds a modern twist to the rustic aesthetic. It is an excellent choice for homeowners who want the look of natural stone. Quartz worktops offer durability, ease of maintenance, and design versatility, enhancing the functionality and visual appeal of a rustic kitchen.
Preparing the Worktop Surface

Proper surface preparation is essential for achieving a professional-looking rustic red kitchen worktop. Regardless of the material, thorough preparation ensures the paint or stain adheres properly. Start by cleaning the worktop to remove any dirt, grease, or residue. If it is an existing worktop, sanding the surface can improve paint adhesion. For wood worktops, sanding helps to open up the pores of the wood. For laminate or other non-wood surfaces, sanding is a crucial step in providing a slightly rough surface. Use appropriate sandpaper grit to remove imperfections and create a smooth base. After sanding, wipe away all dust particles using a tack cloth or a damp cloth. Fill any cracks, holes, or imperfections with wood filler or a suitable sealant. Allow the filler to dry completely. Once dry, sand the filled areas to create a smooth, level surface. Clean the surface once more to remove any sanding dust. This preparation step is the most important part of ensuring a durable and attractive finish. The surface preparation guarantees that the red paint or stain will adhere properly, resulting in a long-lasting and visually appealing rustic red kitchen worktop.
Cleaning and Leveling
Before you begin applying any finish to your rustic red kitchen worktop, the surface must be impeccably clean and perfectly level. Begin by thoroughly cleaning the entire worktop area. Use a degreasing cleaner to remove any grease or oily residue. Rinse the surface with clean water and allow it to dry completely. Leveling is crucial for a uniform and professional appearance. Use a level to identify any uneven spots. If the worktop is not level, you may need to use shims or other leveling materials. Place the shims under the worktop, or under the cabinets supporting the worktop, to eliminate any dips or inclines. Use a sander to remove imperfections and provide an even surface. Ensure that the worktop is perfectly horizontal and the plane is aligned with the other surfaces. This step guarantees a smooth, professional finish, and helps prevent pooling of the paint or stain. Cleaning and leveling are crucial for creating a visually appealing and functional rustic red worktop. Precise leveling provides a smooth and uniform application of the finishing product.
Applying Red Paint or Stain
Applying the red paint or stain is the critical step in transforming your worktop into a rustic red centerpiece. After the surface is properly prepared, select your chosen red color. Choose a paint or stain appropriate for the worktop material. For wood surfaces, consider using a wood stain. For laminate, choose a paint specifically designed for that material. Before applying the paint or stain, read the manufacturer’s instructions. Apply the first coat of paint or stain evenly, following the wood grain if applicable. Use a brush or roller, depending on the product. Allow the first coat to dry completely before applying a second coat. This will allow for a deeper and more uniform color. For stain, wipe off any excess stain after the recommended time. This will prevent the finish from becoming too dark. Lightly sand between coats to ensure a smooth finish. The choice of paint or stain affects the final look. This step will contribute to achieving the desired rustic aesthetic. The application of the red color will bring your worktop project to life.
Choosing the Right Red Shade

Selecting the perfect red shade is key to creating a rustic aesthetic for your kitchen worktop. Red shades come in various hues. The appropriate shade will affect the overall look of your kitchen design. Consider the existing color palette in your kitchen. Warmer reds, such as brick red or barn red, can create a classic rustic look. For a more contemporary rustic feel, consider muted or slightly weathered red shades. Think about the amount of light in your kitchen. Darker reds may appear deeper in a room with limited natural light. In a well-lit kitchen, brighter reds can create a bolder statement. The type of paint or stain can affect the final color. Always test the color in an inconspicuous area before applying it to the entire worktop. Testing the colors ensures that it harmonizes with your kitchen design. The red shade you choose will set the tone for your kitchen decor. Your personal preferences are also important. Choosing the right red shade is a pivotal step in achieving your desired rustic aesthetic. This makes your kitchen a welcoming and visually appealing space.
Sealing and Protecting Your Worktop
Sealing and protecting your newly painted or stained rustic red kitchen worktop is crucial for its longevity and resistance to wear and tear. A sealant provides a protective layer that prevents moisture, stains, and scratches. Select a sealant appropriate for the worktop material and finish. For wood, choose a sealant specifically formulated for wood surfaces. For laminate or other surfaces, select a sealant designed for those materials. Ensure the worktop is completely dry and clean. Apply the sealant according to the manufacturer’s instructions. Typically, this involves applying several thin coats. Allow each coat to dry completely before applying the next. Sand lightly between coats to create a smooth surface. Sealing will help protect your worktop from everyday use. Proper sealing minimizes the risk of water damage and staining, which ensures your worktop retains its beauty. The right sealant will enhance the durability and ease of maintenance of your worktop. This will keep it looking its best for years to come.
Selecting a Protective Sealant
Choosing the right protective sealant is essential for your rustic red kitchen worktop. The sealant creates a protective barrier against spills, stains, and scratches. Various sealants are available, so selecting the right one ensures long-lasting protection. For wood worktops, consider a polyurethane sealant or a food-safe oil finish. Polyurethane offers excellent water resistance and durability. Oil finishes provide a natural look. For laminate or other surfaces, research sealants that are specifically designed for those materials. Consider your kitchen usage and the desired aesthetic when choosing a sealant. A matte finish offers a more natural look. A glossy finish provides enhanced durability. The type of sealant should be resistant to heat and chemicals, which are frequently used in kitchens. Always check that the sealant is food-safe. Read reviews and compare different sealants. The right sealant will protect and enhance the beauty of your rustic red worktop. Proper selection makes the worktop easy to maintain.
Applying the Sealant

Applying the sealant correctly is crucial for the long-term protection of your rustic red kitchen worktop. The steps include a detailed application to create a durable and aesthetically pleasing finish. Prepare the worktop by making sure it is clean, dry, and dust-free. Read the manufacturer’s instructions for the sealant you have selected. Use a brush, roller, or applicator appropriate for the sealant type. Apply the sealant in thin, even coats. Avoid applying too much sealant at once. This can result in drips or uneven coverage. Allow each coat to dry completely according to the manufacturer’s instructions. Lightly sand the surface between coats. This provides better adhesion for subsequent coats. Apply multiple coats. This ensures complete coverage and maximum protection. Ensure proper ventilation while applying and drying the sealant. This also helps prevent the buildup of fumes. Properly applied sealant adds to the visual appeal and provides optimal protection for your rustic red kitchen worktop. Attention to detail during the application process helps extend the lifespan of your worktop. It makes maintenance easier.
Installing Your Rustic Red Worktop
Installing your rustic red kitchen worktop properly is crucial for achieving a functional and aesthetically pleasing result. After preparing the worktop and applying the protective finish, the installation process begins. If you are replacing an old worktop, carefully remove the existing worktop. Make sure the base cabinets are level and in good condition. Place the new worktop on the base cabinets, making sure it is aligned with the edges. Use shims to level the worktop if needed. Secure the worktop to the cabinets using screws or appropriate fasteners. This will prevent any movement or shifting. Cut any necessary holes for sinks, cooktops, or other fixtures. Ensure the cuts are precise and clean. Seal the edges around the sink and cooktop with a waterproof sealant. This prevents water damage and ensures a watertight seal. Finally, inspect the worktop for any imperfections or gaps. Correct them as needed. The correct installation makes the worktop look visually pleasing. Precise and proper installation is important to create a stable and functional workspace. This final step completes the process.
Cutting and Fitting
Cutting and fitting your rustic red worktop correctly is essential for achieving a professional finish. Accurate measurements are crucial for a successful installation. Use a measuring tape and a pencil to mark the cutting lines on the worktop. Use the appropriate tools for cutting the worktop material. If using a circular saw, make sure the blade is suitable for the worktop material. Always wear safety glasses and a dust mask. When cutting, follow the marked lines precisely. Ensure the cuts are straight and clean. For cutouts for sinks or cooktops, use a jigsaw or other suitable tools. Drill pilot holes at the corners of the cutouts to make starting the saw easier. Remove the cut pieces carefully. After cutting, test fit the worktop to make sure it fits the cabinet spaces. Smooth any rough edges using sandpaper or a file. Cutting and fitting the worktop require attention to detail. The right tools ensure the worktop fits perfectly, enhancing the kitchen’s functionality. Properly cut and fit worktop adds to the overall aesthetic.
Securing the Worktop

Securing the rustic red worktop to the base cabinets is vital for stability and safety. Begin by ensuring the cabinets are level. Then, carefully position the worktop onto the cabinets, making sure it is correctly aligned. Use screws or appropriate fasteners to secure the worktop to the cabinet frames. Drill pilot holes to prevent the wood from splitting, especially near the edges. Space the screws evenly. Place them along the cabinet edges to distribute the weight. For a more secure hold, you may choose to use construction adhesive. Apply the adhesive to the cabinet frames before placing the worktop. Allow the adhesive to dry completely before applying the screws. For worktops with a heavy or large surface area, consider using additional support brackets. Position these brackets underneath the worktop to offer extra stability. Make sure that the worktop is completely secured to the cabinets to prevent movement and ensure safety. Properly securing the worktop guarantees it remains in place. This ensures the durability and safety of your new kitchen surface.
Maintaining Your Rustic Red Worktop
Proper maintenance is key to preserving the beauty and longevity of your rustic red kitchen worktop. The maintenance will help keep the worktop looking its best for years to come. Regularly clean the surface with mild soap and water. Avoid using harsh chemicals or abrasive cleaners. These cleaners can damage the finish and dull the color. Wipe up spills immediately to prevent stains. Use coasters and trivets to protect the worktop from heat. Avoid placing hot pots and pans directly on the surface. Use cutting boards when preparing food. This will protect your worktop from scratches. Inspect the worktop for any signs of damage, such as cracks or chips. Address these issues promptly. Reapply sealant periodically, depending on the sealant type and usage. Routine cleaning and maintenance will keep your worktop looking vibrant and new. Proper maintenance protects your investment. The maintenance will retain the rustic charm of your kitchen.
Cleaning and Maintenance
Regular cleaning and maintenance are essential for keeping your rustic red worktop looking its best. Develop a cleaning routine that suits your usage patterns. Clean spills immediately to prevent staining. For daily cleaning, wipe the surface with a soft cloth and mild soap and water. Rinse well and dry with a clean cloth. Avoid using abrasive cleaners or harsh chemicals, which can damage the finish. Depending on the material and sealant type, you may need to reapply the sealant periodically. This protects against water damage and staining. For wood worktops, apply a food-safe oil as needed to maintain the wood’s natural beauty. Protect your worktop from heat and scratches. Use trivets and cutting boards when preparing food. Regularly inspect the worktop for signs of wear and tear, such as cracks or chips. Promptly address any issues to prevent them from worsening. Regular cleaning and maintenance preserve the rustic charm. These will also ensure that your worktop remains a functional and visually appealing centerpiece.
Addressing Common Issues
Addressing common issues promptly can extend the lifespan of your rustic red kitchen worktop. Inspect your worktop for signs of wear and tear. Some issues include scratches, stains, and water damage. Address scratches by using a wood filler or a suitable repair product. Lightly sand the damaged area. Apply the appropriate finish to blend it with the surrounding surface. Clean stains immediately using a recommended cleaner. For stubborn stains, you may need to consult a specialist. If you notice water damage, especially on wood worktops, act quickly to prevent further damage. Wipe up any standing water and dry the area thoroughly. Consider resealing the affected area. For chips or cracks, repair them using a suitable filler or epoxy. Prevent future issues by following a regular maintenance schedule. Taking care of your worktop and addressing issues can maintain the appearance. By addressing any issues swiftly, you will protect your investment.